This is continued from Part one here:
http://mariesegal.blogspot.com/2011/05/african-trade-beads-part-12-shinning.html
You will need:
Clay Machine
clay slicing blade-SB
Red Cernit
Yellow Cernit
Blue Cernit
Opaque White Cernit
Green Cernit
Porcelain White Cernit
Ruler if you need it
Middle cutter in the Makin's clay Star set M36006
Knitting needle 3 to 4mm
All links above lead to my husband's on-line store the http://www.clayfactory.net/
Thank you so much for looking.
Mix all of the colors and the opaque white with equal amount of the porcelain white.
Last picture from the last part
I go back and cradling the star in my palm I pinch the points on the star again to sharpen them up.
Roll out a sheet of the conditioned red that is long about 5"x at least 2 1/2" wide.
Trim for straight edges on three sides.
Roll out a coil that is about 3/8" in diameter and the width of the sheet.
Lay the coil along the bottom edge of the sheet.
Roll up the sheet and the coil together to form a large coil of clay.
Trim off the rough edge and roll the whole thing up.
Roll the cane down until at least half or more fit in one of the dips between the points of the star. Measure it to the height of the stacked stars and cut one. I trim off one end of the red log so it will stand straight next to the star stack.
Cut two more of those coils.
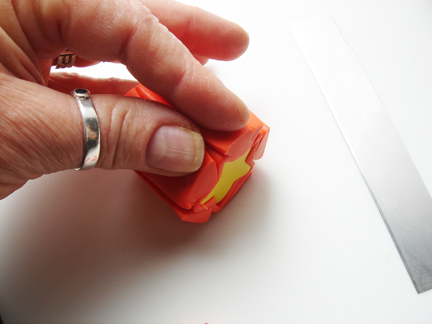
Press with your finger and thumb of one hand down and out on the coil and then using the clay slicing blade cut the coil in half.
Do that with the other two coils too!
Like this.
Make the coil into a triangle piece by pressing with your thumb and forefinger on top of the coil half, press straight down with your finger and thumb pressed together.
It will look like this. Do that with the other pieces, you will only need 5 total.
Place the point of the coil into the dip between the point of the stars. Place one in each dip.
Stand the star up so you do not smash the points of the star.
Trim off the excess length from the top of the triangle half coils.
Place all of the coils before worrying about how they fit yet!
Place the last one in and trim off the excess from the top.
Note* I cradle this in my other hand while press the two edges of the half triangle coils together.
I do a little at a time on all of them and then turn the cane from end to end and so it again all the way around.
I am only showing it on the work surface because I take the pictures by myself.
Press your thumb towards your forefinger.
Here is what the star stack will look like after you have packed it.
Don't worry if it doesn't look perfect from the end. There is some distortion by pressing the clay and the ends will look funny but may not be funny inside.
Condition and roll out a sheet of the opaque white. Trim the side to the star stack and the edge before the star stack.
Now trim the other side to match the star stack.
Roll the cane up in the sheet of white and roll the leading cut edge over the sheet on the opposite end to make a mark. You do not have to press hard just enough to make a mark with the cut edge.
With your clay slicing blade cut just inside the mark you made with the opposite edge of clay.
Roll the cane up in the sheet and the edges should meet very nicely.
Trim off the excess, if there is any.
Stay tuned for part 3...


Seguiremos esperando...Es precioso. Besos
ReplyDeleteHey, Marie!!
ReplyDeleteYou know that I don't work with clay but I'm always fascinated to see what your doing and so enjoy reading your process!! : )
It is coming, it is coming, Ma Reyes!
ReplyDelete;-D
Thanks Manon!
ReplyDeleteI love watching others work their craft.
Sometimes it gives me insight to my own!
Hi Marie!!! this is so stellar!!! no pun intended!!! wonderful work!!!
ReplyDeleteThanks Diana!! I liked stellar, sounded great!
ReplyDelete