
Here
http://mariesegal.blogspot.com/2009/04/playing-with-my-food.html
Here
http://mariesegal.blogspot.com/2010/09/playing-with-my-food-again-episode-2.html
Here
http://mariesegal.blogspot.com/2010/09/playing-with-my-food-again-episode-3.html
Here
http://mariesegal.blogspot.com/2010/09/playing-with-my-food-again-episode-4.html
This one is going to be about using those fabulous clay tools called Texture plates for your food. Not just clay tools anymore.
This got me to thinking, when I first started working with polymer clay in 1978, I use my ceramic tools and kitchen tools.
I think I can say I have come full circle to using my clay tools for food now.
I have learned that I do not put labels on my tools now. If I find it at a hardware store and it works, it is a tool. If I find it in nature and it works, it is a tool. Now, tools are everywhere!!!
I do suggest though that if you are going to use the texture plates for food that you get a new set. These are inexpensive and will be used over and over again if you are having as much fun playing with your food as I am.
They can also be used as large stamps, crayon rubbings, texturing plaster, texturing paint, or even cement and probably a lot more things than I can think of right now!
So we will play with the texture plates and then from there we will move in to the project Jodi and I made from this.
Just in time for the upcoming Halloween Holiday!
Links will take you to the corresponding page in my Hubby's on line store, http://www.clayfactory.net/. Thank you for supporting my family and myself.

I rolled out my fondant to about 1/8 " with the green roller.

We are going to use both of them for this blog.

If you are going to roll the fondant in to the texture sheet then the roller has something to grab on to. It is easier to roll then.
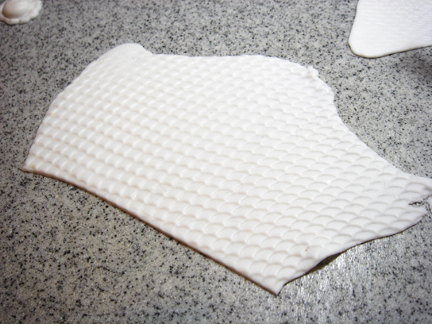 This is how the fondant looks after the texture sheet is removed. I did not use anything on the fondant to resist the texture sheet, but you could use shortening or powdered sugar as a releasing agent.
 Here is the wood grain texture sheet. I used the chocolate fondant from Pila's Pantry, (this one is my all time favorite fondant, it tastes like tootsie rolls) and followed the instructions above to make this sheet of wood grained texture.
I then used some matt brown pigment I also bought from Pila's to highlight the texture of the wood grain. Put some on your finger as if it was pearl-ex and spread on the sheet of fondant wood grain. Or you could use a soft brush to place it on the fondant. The soft brush will though cover the whole surface not just the high spots.


Fun, fun, fun!

We put this aside and continued on to the next part.

This is one of my very favorite textures in clay or food.

 I then spread the powder out with my finger so I have no clumps and brush on to the fondant. If I do not do this the clumps will fall off my finger and cover everything not just the high spots on the texture.
We then drew up a small simple stencil on paper for a house. Cutting it out with the rolling cutter which is part of the rolling pin set.
The top strip is going to be the sides of our house.

We saved all the trimmings too, just in case we might need them later. We did.

We "glued" on the sides and the back of the house with chocolate frosting, Added the roof which was just more of the scale textured fondant, added a chimney, painted the pink marshmallows that showed inside the windows with chocolate frosting and set the house aside.
I am so sorry there are no pictures for this, we both got so involved with what we were doing, we forgot to take them.
Stay tuned for part 2...
Staying tuned...!!
ReplyDeleteQue maravilloso tutorial, estoy deseando ver la 2ª parte.
ReplyDeleteEs una casita de chocolate para Navidad?
besitos ascension
oh what fun!!! can't wait for part deux!!!
ReplyDeleteOMGoodness, I cannot wait to see your Gingerbread house for Christmas!!! So cute, Marie! **kisses** Deb
ReplyDeleteYou are definitely having fun! I love the colors. So vibrant and I want to eat them!
ReplyDelete